


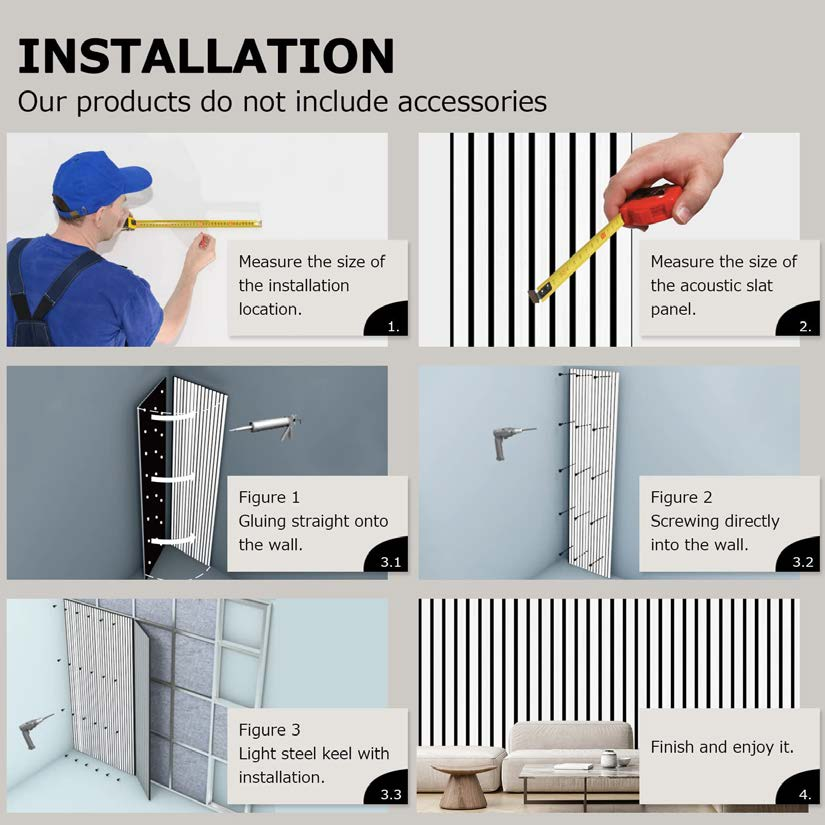
The wood slat panel is easy and efficient to install on all types of walls and ceilings, making it ideal for interior decoration and acoustic optimization. Whether it's a family home or a commercial space, the installation process for Real wood slat panels is carefully designed to be efficient, robust and aesthetically pleasing.
First, make sure the wall or ceiling is clean and flat before installation. This step is critical because a smooth surface helps the wood slat panel adhere firmly. If there are large unevenness in the wall, simple leveling is recommended.
Real wood slat panels are usually installed in two main ways: glued and screwed. For the glue fixing method, a strong construction adhesive is used to spread the support layer on the back of the wood slat panel and then the panel is pressed firmly onto the wall. This method is ideal for situations where you do not want to leave screw marks on the wall and the installation process is very quick.
Screw mounting, on the other hand, is suitable for situations where a more robust installation is required. The support batten or frame is first mounted to the wall and then the 3 sides veneer wood slat panel is screwed to the frame. For aesthetics, the heads of the screws are usually hidden in the grooves of the wood slat panel, creating a seamless look.
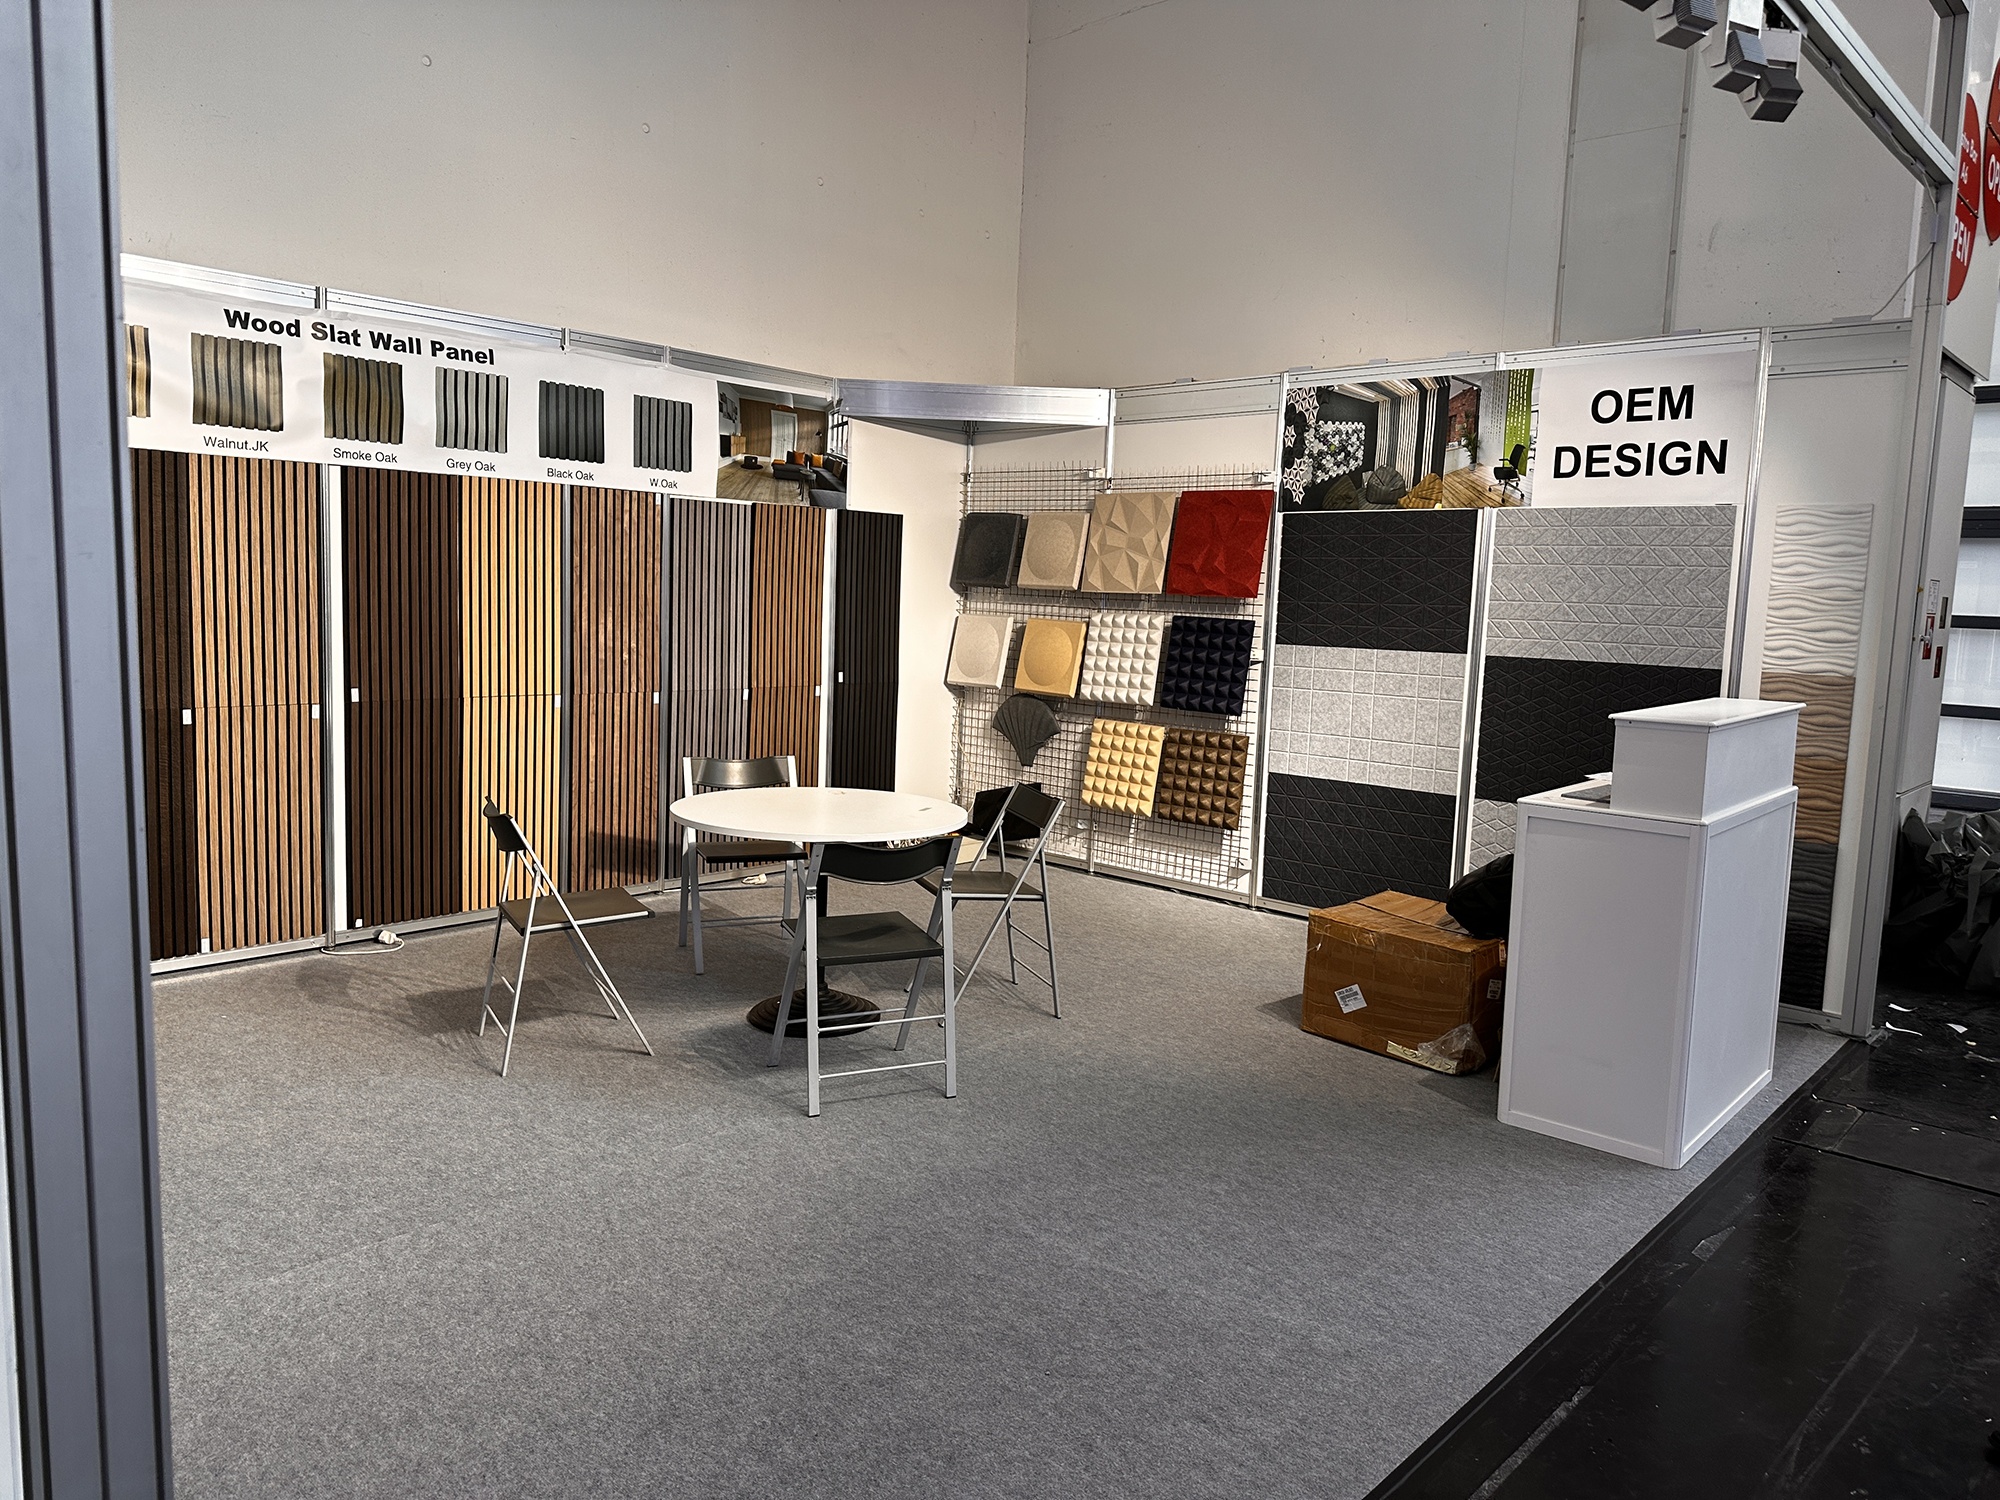
In addition, the modular design of the Real wood slat panel allows the panels to be easily aligned and cut to fit, greatly increasing the flexibility of the installation. For projects that require later disassembly or realignment, acoustic wall panels also support quick disassembly and reinstallation for easy maintenance and remodeling.
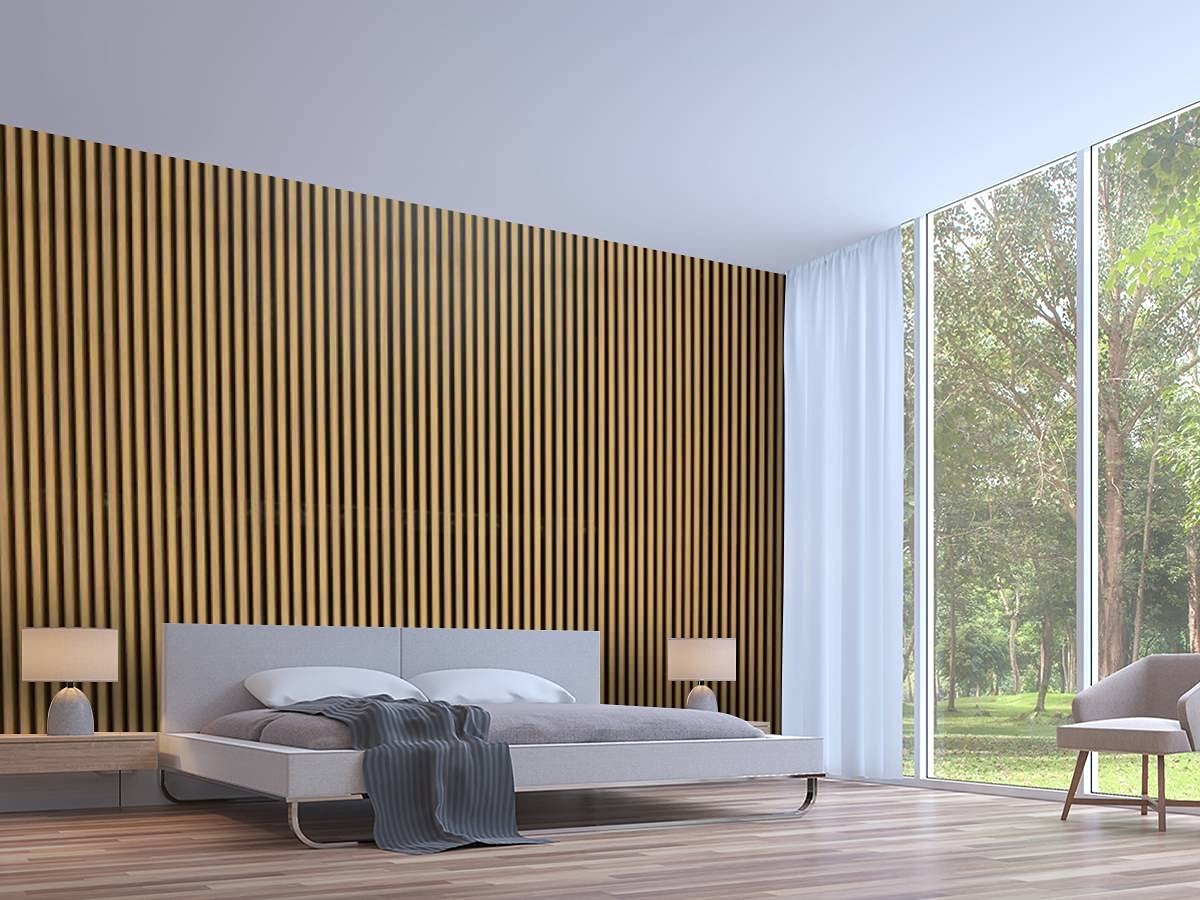
Whether installed vertically, horizontally or in a ceiling application, Real wood slat panels are easy and flexible to install, helping homeowners achieve the perfect combination of aesthetics and functionality.
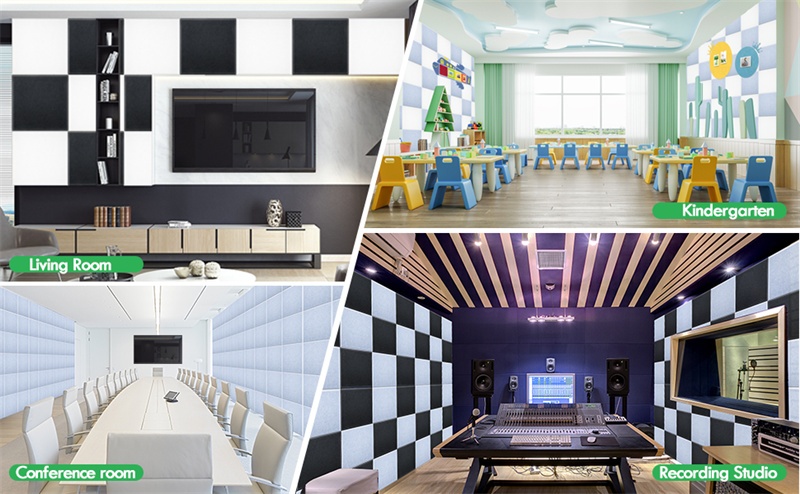

Installation of 3 sides veneer wood slat panels: easy and fast for a variety of scenarios.
The wood slat panel is easy and efficient to install on all types of walls and ceilings, making it ideal for interior decoration and acoustic optimization. Whether it's a family home or a commercial space, the installation process for Real wood slat panels is carefully designed to be efficient, robust and aesthetically pleasing.
First, make sure the wall or ceiling is clean and flat before installation. This step is critical because a smooth surface helps the wood slat panel adhere firmly. If there are large unevenness in the wall, simple leveling is recommended.
Real wood slat panels are usually installed in two main ways: glued and screwed. For the glue fixing method, a strong construction adhesive is used to spread the support layer on the back of the wood slat panel and then the panel is pressed firmly onto the wall. This method is ideal for situations where you do not want to leave screw marks on the wall and the installation process is very quick.
Screw mounting, on the other hand, is suitable for situations where a more robust installation is required. The support batten or frame is first mounted to the wall and then the 3 sides veneer wood slat panel is screwed to the frame. For aesthetics, the heads of the screws are usually hidden in the grooves of the wood slat panel, creating a seamless look.
In addition, the modular design of the Real wood slat panel allows the panels to be easily aligned and cut to fit, greatly increasing the flexibility of the installation. For projects that require later disassembly or realignment, acoustic wall panels also support quick disassembly and reinstallation for easy maintenance and remodeling.
Whether installed vertically, horizontally or in a ceiling application, Real wood slat panels are easy and flexible to install, helping homeowners achieve the perfect combination of aesthetics and functionality.
READ MORE:
- Are AKUPANELS eco-friendly?
- How are AKUPANELS installed?
- What sizes do AKUPANELS come in?
- What are AKUPANELS made of?
- What is the future development forecast for the wood slat panel industry?
- What are the latest technology trends in the 3 sides veneer wood slat panel industry?
- What is the market size of the 3 sides veneer wood slat panel industry?
- What are the color and texture options for Real wood slat panel?
- What are the main functions of wood slat panel?
READ MORE:
- What are the latest technology trends in the 3 sides veneer wood slat panel industry?
- What is the market size of the 3 sides veneer wood slat panel industry?
- What are the color and texture options for Real wood slat panel?
- What are the main functions of wood slat panel?
- What is wood slat panel?
READ MORE:
- What sizes do AKUPANELS come in?
- What are AKUPANELS made of?
- What is the future development forecast for the wood slat panel industry?
- What are the latest technology trends in the 3 sides veneer wood slat panel industry?
- What is the market size of the 3 sides veneer wood slat panel industry?
- What are the color and texture options for Real wood slat panel?
- What are the main functions of wood slat panel?
- What is wood slat panel?
READ MORE:
- What is the market size of the 3 sides veneer wood slat panel industry?
- What are the color and texture options for Real wood slat panel?
- What are the main functions of wood slat panel?
- What is wood slat panel?
READ MORE:
- What is the market size of the 3 sides veneer wood slat panel industry?
- What are the color and texture options for Real wood slat panel?
- What are the main functions of wood slat panel?
- What is wood slat panel?
READ MORE:
- How are AKUPANELS installed?
- What sizes do AKUPANELS come in?
- What are AKUPANELS made of?
- What is the future development forecast for the wood slat panel industry?
- What are the latest technology trends in the 3 sides veneer wood slat panel industry?
- What is the market size of the 3 sides veneer wood slat panel industry?
- What are the color and texture options for Real wood slat panel?
- What are the main functions of wood slat panel?
READ MORE:
- Are AKUPANELS eco-friendly?
- How are AKUPANELS installed?
- What sizes do AKUPANELS come in?
- What are AKUPANELS made of?
- What is the future development forecast for the wood slat panel industry?
- What are the latest technology trends in the 3 sides veneer wood slat panel industry?
- What is the market size of the 3 sides veneer wood slat panel industry?
- What are the color and texture options for Real wood slat panel?
- What are the main functions of wood slat panel?


